Your address will show here +12 34 56 78
Appropriate Technology

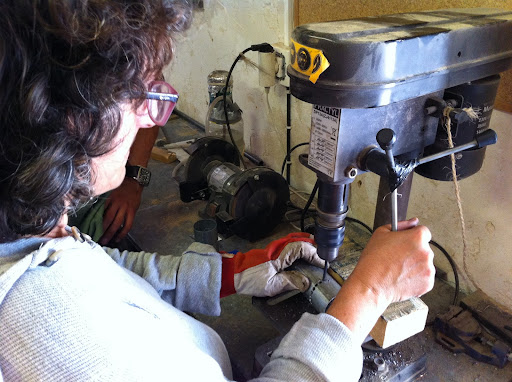
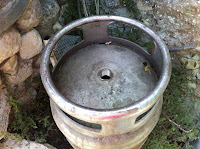
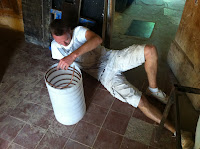
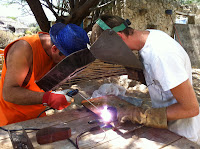
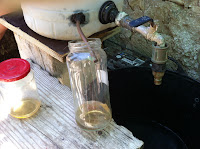
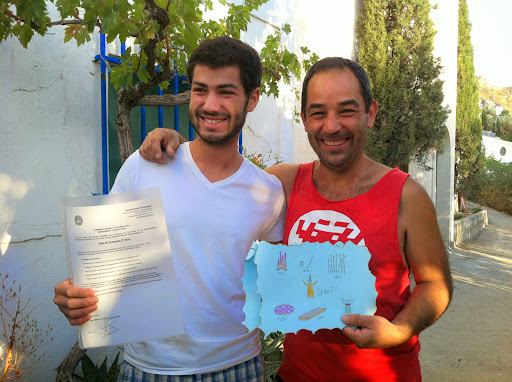
Los Molinos de los Rio Aguas got a sharp reminder never to take water for granted when the hydraulic ram pump that provides the whole village with water stopped functioning recently. With no water from the taps or showers, we had to collect it from the acequia (water line) – a tiring and time-consuming job every morning! With the pump needing replacement and improvement on an old design, technical team assistant Joe and his friend Ryan stepped up to do the job; a stressful experience with no test run requiring a lot of determination and teamwork.

DSC02170

The first self-acting ram pump was invented in 1796 by Joseph Montgolfier, co-inventor of the hot air balloon – the designs now change depending on location and equipment, but the idea remains the same. Ram pumps use the kinetic energy created from the water source when the impulse valve (pressure head) pushes it to an outlet of higher elevation. Unless you use a petrol pump, the ram pump is a zero-pollutant technological piece, perfectly appropriate for the ecovillage which Sunseed is a part of.

According to Joe, ram pumps can be used anywhere as long as there is some height for water to drop from to create the correct flow and a consistent and sufficient source of water such as a river or brook. Therefore, the diverse terrain and undulating region of Andalusia makes the ram pump the perfect source of water for Los Molinos and Sunseed.

The new ram pump was successfully completed within one full working week, much cheaper and more efficient than getting one made and delivered. Ram pumps can cost up to €3,000, while Joe and Ryan estimate that all the equipment is only around €550. They also both agree that the fact that no external energy required is key, avoiding added equipment and the use of any manual labor after construction except for the annual maintenance check.

DSC02176


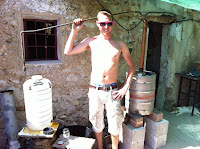
Water is delivered at all times now to all taps and tanks twice as efficiently as the previous pump and with a perfect water cycle – any extra water falls back to the river, so none is wasted. Across a large area that is arid and dry, an even distribution of water is available to the whole village and this should be the case for the next 40-60 years which is 2 or 3 times as long as the last ram pump lasted, approximately 20 years.

Joe and Ryan made the ideal ram pump for all the villagers in Los Molinos and we thank them for it. Out of respect for nature and one another, Los Molinos continues to thrive towards our vision of low-impact, sustainable living.

by volunteer Lara Worthington

7

Appropriate Technology, Courses and Events

El último fin de semana de 16-17 de abril hemos llevado a cabo un taller de Tratamiento de Aguas Residuales por Fitodepuración, facilitado entre los coordinadores de Sunseed y el colectivo Paissano, amigos de Sunseed apasionados por temas de tratamiento y potabilización de agua. Hemos invitado a participar tanto a lxs voluntarixs de Sunseed como personas de la zona interesadas en aprender cómo construir un sistema ecológico de tratamiento de aguas residuales casero y de bajo costo. Después de cubrir los gastos básicos de comida y alojamiento el aporte económico ha sido voluntario.

Entre unos 10 participantes del curso emprendimos un proyecto práctico de mejorar la última etapa de nuestro sistema de aguas y embellecer el espacio alrededor del camino a la famosa poza de Los Molinos. ¡Construimos un estanque nuevo!

Pond 1

Los estanques están habitualmente instalados como la última etapa de sistemas de tratamiento de agua con humedales artificiales (reed beds). Sirven tanto para almacenar el agua depurada con fin de aprovecharla para riego, como para crear un hábitat natural de fauna y flora, así aumentando la biodiversidad del entorno. Nuestro estanque consiste de una zona de infiltración con grava (sembrada con plantas depuradoras – macrofitas) y zona profunda dónde en futuro queremos plantar macrofitas flotantes como lentejilla de agua o nenúfares. Cuenta con 1200 litros de almacenamiento y un desagüe instalado para regar una huerta/jardín ejemplo en el futuro. El diseño del jardín se realizará durante el Curso de Diseño en Permacultura en Sunseed (1-15 de mayo 2016).

Etapas de construcción

Digging pond
Pond mud

Primero lo primero, tuvimos que limpiar la zona de construcción, anteriormente ocupada por un estanque fantasma, cual con tiempo se había llenado con barro y ha sido apoderad de la omnipresente caña. Los rizomas de caña habían perforado la capa impermeabilizante de plástico, cual dejó de cumplir su función.  

Limpiando la zona del viejo estanque, mucho barro y rizomas de caña…

Después de cavar dimos la forma al estanque nuevo, a través de un proceso de diseño interactivo entre todxs llegamos al consenso de construir una isleta en medio y así naturalmente dar al estanque una pendiente de bajada alrededor de ella. Compactamos el fondo e instalamos el tubo de desagüe.

Installing overflow tube

Instalación del tubo de desagüe.

Impermeabilizamos el estanque con EPDM, un material resistente y flexible. Alrededor colocamos piedras y construimos un pequeño muro seco de ellas para proteger ante la caída del barro en caso de lluvias fuertes. Al seguir rellenamos la parte poco profunda con grava. Ahora solo falta rellenar el estanque con agua y sembrar plantas.

Guy and Blanca with pond

Pensando en los futuros habitantes de nuestro estanque hemos construido una cuevita, la futura casa de una rana muy feliz.

Pond plants 1
Finished pond

Con finalizar la construcción hemos abierto muchas posibilidades de crecimiento de este proyecto. Varias personas voluntarias de Sunseed van a tener la posibilidad de experimentar con la siembra de plantas, elaboración de un jardín autoregante con agua depurada y las modificaciones estéticas del mismo estanque. Como siempre en Sunseed, un proyecto nunca termina, sino va evolucionando…

Para mas información sobre proyectos y cursos parecidos, puedes contactar con nuestro coordenador de Tecnologías Apropriadas, Piotr: piotr.jankowski@hotmail.com.

0

Appropriate Technology, Courses and Events, Sunseed News

Sunseed’s Appropriate Technology co-coordinator Piotr explains how we built a beautiful pond as part of our eco-friendly wastewater treatment system.

Last weekend of 16-17 April at Sunseed we conducted a workshop on Ecological Wastewater Treatment, facilitated by the coordinators of Sunseed and the Paissano collective – friends of Sunseed and big water treatment and purification enthusiasts. We invited both Sunseed volunteers and people from the Almería province interested in learning how to build a low cost ecological wastewater treatment at home. The financial contribution to the course was voluntary, after assuring the basic costs of food and accommodation.
Among some 10 participants of the course we undertook a practical project to improve the last stage of our wastewater system and beautify the space around the path which leads to the famous pool of Los Molinos. We have built a new pond!

Wastewater treatment pond

Ponds are often installed as the last stage of wastewater treatment systems with constructed wetlands (reed beds). They serve a basic function of storing the treated water in order to reuse it for irrigation, as well as to create a natural habitat for fauna and flora, thus increasing the biodiversity of the environment. Our pond consists of an infiltration area with gravel (planted with water treatment plants – macrophytes) and a deep area where in the near future we would like to plant floating macrophytes. It stores 1200 liters of water and is equipped with an overflow system to irrigate an educational self-irrigating garden in the future. We will leave the garden design to the participants of a Permaculture Design Course held by Sunseed between the 1st and 15th of May.

Construction Stages

First things first, we had to clean the construction area previously occupied by a ghost pond, which with time was filled with mud and has been taken over by the ubiquitous cane plants. The rhizomes of cane had pierced the waterproof layer of plastic, which had thus stopped serving its function.

Digging the wastewater pond
Preparing the wastewater pond

Cleaning the old pond area – a lot of mud and cane rhizomes…

After the digging we interactively and collectively designed the form and shape of the new pond. We decided to construct a division wall which allows to have a natural slope around it. Subsequently the ground was compacted and the overflow tube installed.

Installing overflow tube

Installation of the overflow pipe

We waterproofed the pond with EPDM liner, a very strong and flexible material used widely in this type of application. Around the pond we placed stones and built a small dry wall to protect the pond from mud falling inside during heavy rains. Then we filled the shallow area with gravel. Next comes the exciting part of filling it with water and planting the plants.

Guy and Blanca with pond
Petr and pond

Keeping in mind the future habitants of our pond we have created a small cave, a future house of a very happy frog.

Pond plants 1
Finished pond

With the completion of the construction of the pond we have only opened it up for the future improvements and changes. Many Sunseed volunteers will have the opportunity to experiment with the planting of plants, elaboration of a self-watering garden with purified water and the aesthetic modifications of the pond itself. As always in Sunseed, a project never finishes, it evolves…

For more information on similar future projects and courses, contact Sunseed’s Appropriate Technology co-coordinator Piotr on piotr.jankowski@hotmail.com.

1

Appropriate Technology
water pumpOne of the major projects and work of the Appropriate Technology department this summer has been a much needed renovation of the famous Sunseed ram pump! The ram pump is one of the best example of appropriate technology in Sunseed. It provides water to the village of Los Molinos from the ancient irrigation canals, 24 hours a day, 7 days a week, 365 days a year without any electricity or wires. The only energy it requires is the water pressure created by gravity. The ram pump has been in the village since the mid 1980’s, but it has not had a proper overhaul for years. This summer there were some problems with breakdowns and irregular performance. Our AT team rose to the challenge! Becky and Sara doing maintenanceEngineering interns Becky and Sarah at the pump DSC00039The pump needing some TLC Second leak bad repair and overgrown drive pipeOne of the leaks in the very over-grown drive pipe DSC00017A rusted up air vessel with the bad kind of holes… DSC000j08A cracked pulse valve plate. Turns out we don’t need one if the pulse valve rubber is thick enough…   Upgraded non-return valve2Above in picture is the old no-return valve on the feed tube provifing the village with water. The valve itself is the gray bit in the middle. and on each side of it is a small adaptor piece that connects it to the tube connectors. Turns out the inner diameter of the adaptor piece was only 10mm in diameter, and thus were a big restriction on the flow, as the inner diameter of the pipe is 16mm. Below in the picture is the beefed-up replacement. The water flow to the villagers almost dubbeled! Coning tube end for better flowEmil, our AT Coordinator, coning the end of the feed pipe to reduce water turbulence in the connection. DSC00141We made some changes as we fabricated a new air vessel, in particular we upgraded the feed pipe connection. Here you see the new sturdy 25mm brass fitting, replacing a flimsy 20mm plastic thing.DSC00142The AT team are now preparing to put in a new upgraded drive pipe. We recognized that stone-lining the trench for the drive pipe will stop most vegetation as well as erosion and to keep the trench clear for easier maintenance. It’s a big job, but we decided it was worth it, if only for the presentable estetics it adds. Gillian stone-lining day 4c Many volunteers had a chance to help in this project, and learn some useful stone walling techinques. Here are our volunteers Gillian (above), Natalie and Leonardo (below) working on the stone lining and supporting walls. Leonardo and Nathalie stone-lining day 2aLeonardo and Nathalie stone-lining day 2d A big thank you to everyone involved in the ram pump renovation of 2014!
0

Appropriate Technology, Sustainable Living
DSCF1858Sunseed has a low impact fridge! This summer two French interns, Benjamin and Sylvain, joined us in the AT department. Their project was to design and experiment with a low impact fridge for Sunseed. The fridge design that they worked with was called “refrigerateur gigogne” and it aims to conserve food longer and fresher without using electricity. Felix Trombe was the first to experiment with this model in 1962 in France. He demonstrated that it is possible to produce a cold space for food and drink that is simple and electricity free. DSCF1859As it doesn´t use electricity, this fridge is perfectly suitable for an off grid area such as Sunseed. Only a few examples of constructions are available on the Internet and they do not include the storage of food, only the cooling process. Therefore the building of this fridge at Sunseed is very experimental. DSCF1844The temperature is cold enough to keep the food fresh inside the fridge and it is important that the temperature doesn´t rise during the day. Therefore, the way of using the fridge is essentialy this: – Put the fridge outside during the night in a place without trees, buildings or anything that can shade or reflect the heat radiation from the fridge. -Early in the morning (preferably before the rising of the sun)put the lid on the top and move it into a fresh place to keep the cold produced during the night. DSCF1850DSCF1851Well done to Benjamin and Sylvain with their internship, and the maintenance team of Diego and Mirko. DSCF1860
0

Appropriate Technology, Drylands Management, Organic Gardening, Sustainable Living
The Sunseed team has been very busy this week trying to keep up with all of the exciting changes. A lot of new faces have been passing through the village to get a taste of sustainable living. These visitors had the treat of getting the full sustainable living tour during their stay. In addition, the visitors ate meals with the sunseed team and shared many stories during the night. This week there was also a jam session at Timbe’s for people to enjoy. Besides giving tours to newcomers the Sustainable Living team has also been doing some major experimentation! First the team is using donated oil from local restaurants to make bars of soap! I hear they have turned out really well! In addition, Markus and his team have been creating delicious goods out of figs that were recently harvested, and even baked up enough loafs of sour dough bread to feed a village! Drylands management has been very busy picking more than 60 kg of Carob Seeds from the trees by the water pump. The team of 4 consisted of Pablo, Natalie, and Delphine and was led by Alicia. Together they picked 5 huge bags in just a few short days. Now these seeds will be sold to feed piggies, and the rest can be used by sunseed to make sweet Carob treats. The Appropriate Technology department is working to repair the battery connected to the solar panels and working on a massive puzzle of building a stone wall. The Organic Gardening team has also been working away the days. They have been harvesting and weeding quite a lot of veggies including 2kg of basil! Today we received our shipment of vegetables and later we will get a lesson on Spanish from Alvaro. Our trusted water pump is working away vigorously! The communication team has just returned from their annual trip to Rototom music festival, where they did some major promo work for Sunseed. More photos and stories coming soon! water pumpcarrabgardening
0

Appropriate Technology, Eco Construction, Sustainable Living, Tutorial

DSCF0503The African Fridge

By Andreia Bastos

Looking for a homemade way of cooling the drinks, we found out how to make an African Fridge.

The African fridge is mostly used to keep the low temperature of the vegetables, and it works very well with drinks also.

Luckily, we didn’t need to make one, Sunseed already has an African Fridge, lonely, waiting for us to fix it!

Make your own!

All you need is:

Two ceramic pots

Fine sand

Water

Wet towel or cotton fabric

DSCF0508Mirko filling the gap between the pots with sand

The ceramic pots must fit inside one another. Make sure the pots are not glazed or painted, otherwise they won’t work.

Usually the ceramic pots have a small hole in the bottom, if it does they need to be plugged.

DSCF0509DSCF0516

Put the smaller pot inside the bigger one, fill the space between the inner and outer pots with fine sand and soak it with water.

Then put the vegetables inside, cover the fridge with the wet fabric and leave it in a sunny spot.

Yes! The temperature inside goes down as the water evaporates.

DSCF0517Voila!

DSCF0503

Nevera Africana

Por Andreia Bastos

Buscando una forma artesanal de enfriar las bebidas, aprendimos como hacer una Nevera Africana.

La Nevera Africana es mas utilizada para matener la temperatura de los vegetales y tambien funciona muy bien con bebidas.

Por suerte no tuvimos que hacer una, Sunseed tenia una Nevera Africana, esperando a que la arreglasemos!

Hazlo tu tambien!

Todo lo que necessitas es:

Dos jarrones de ceramica

Arena del Rio

Agua

Una toalla o tela de algodon mojada.

DSCF0508

Los jarrones de ceramica deben encajar una dentro de la otra. Asegura te de que los jarrones no estan pintadas o esmaltadas.

Por lo general los jarrones de ceramica tienen un pequeno agujero en la parte inferior, asegurate de taparlo si alguno de los tuyos lo tiene.

DSCF0509DSCF0516

Pon el jarron mas pequeno dentro del grande y llena el hueco entre los jarrones con arena y agua.

Y ya esta! Ahora, pon las verduras/bebidas dentro, cubrelo con la toalla o tela mojada y dejala en un lugar soleado. Lo que ocurre es que la temperatura dentro de la Nevera baja encuanto el agua se evapora.

DSCF0517

0

Appropriate Technology
Hola, today we made more space around our main water storage, to fit two new IBC tanks, buffering water from the village ram pump. DSC_0346Improving the supporting edge. -The blocks of concrete are inclined slightly in the direction of the tanks. DSC_0348Here’s the old tank, which was installed without any protection from the sun. It has now whitered and cracked from exposure to the elements. Two new tans are getting prepared with a protecting layer of black  acrylic paint, and a protecting screen made of cane, to shade out the sun since it would otherwise heat up our black tanks in the desert sun.

¡Hola! Hoy hemos hecho más espacio para dos depósitos para el agua que recogemos de la bomba de ariete.

DSC_0346

Los bloques de hormigón están ligeramente inclinados en la dirección de los tanques.

DSC_0348

¡Ya hemos retirado el depósito blanco y estamos esperando los dos negros!

0

by Pako Ibáñez, Appropriate Technology Department at Sunseed It is time to build a biomass gasification cookstove. With this tutorial you can do it in an easy and cheap way. You can adapt the instructions to the materials you have, or you can find or acquire. There is no overly critical parameter. If you make modifications and does not work 100%, adjust and modify to achieve better results experimentally. The tutorial teaches us how to build a biomass gasifier cookstove called Kaña!!!, Version 1.0, and includes:
  • An explanatory text which lists the material necessary to perform it.
  • The needed tools list.
  • Assembly instructions.
  • A video recorded during the biomass gasification course I did in Sunseed which shows all the steps to follow.
  • The instructions for use.
  • A video about the success story of Lucia, who built the Lucificador and got the absolute record of burning time with a powerful flame for 35 minutes using 350 gr. of dry cane.
  • A section with miscellaneous information.
por Pako Ibáñez, coordinador del Departamento de Tecnología Apropiada de Sunseed. Ha llegado el momento de construirse un hornillo de gasificación de biomasa para cocinar. Con este tutorial podrás hacerlo de una manera fácil y barata. Puedes adaptar las instrucciones al material que dispongas, o bien puedas localizar o adquirir. No hay ningún parámetro excesivamente crítico. Si haces modificaciones y no funciona al 100%, realiza ajustes y modificaciones experimentalmente hasta conseguir mejores resultados. El tutorial nos enseña a construir un hornillo gasificador de biomasa bautizado como Kaña!!!, en su versión 1.0, y comprende
  • Un texto explicativo donde se enumera el material necesario para realizarlo
  • El listado aproximado de herramientas a disponer
  • Instrucciones de montaje.
  • Un vídeo grabado durante el curso de gasificación de biomasa que realicé en Sunseed en el que se muestran todos los pasos a realizar.
  • Las instrucciones de empleo.
  • Un vídeo sobre el caso de éxito de Lucia, que construyó el Lucificador y consiguió el récord absoluto de tiempo de combustión, con una potente llama durante 35 minutos utilizando 350 gr. de caña seca.
  • Un apartado con informaciones varias.
Read MoreContinue Reading
0

by Pako Ibáñez, Appropriate Technology department coordinator at Sunseed. The activity during july has been exceptional at Sunseed. In the AT department we haven’t stop one day with all the projects and activities done by the fantastic volunteers who choose these dates to stay here and share experiences. IMG_5112.JPG 
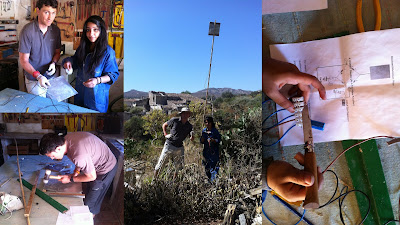
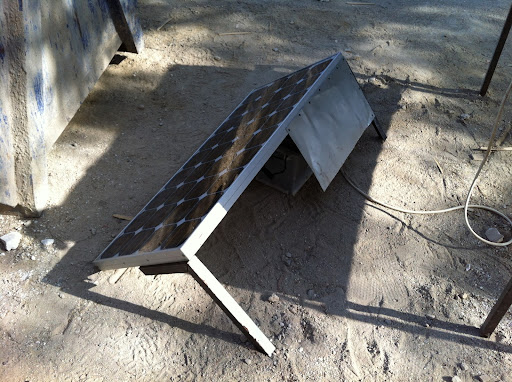
Inga and Rabbiya had their first contact with the photovoltaic panels production servicing all the 3 systems we have installed in the different houses of Sunseed. The dust was cleaned, the output voltages checked, the seals of the connection boxes, distilled water was added to the main house battery and all the connections were tested. IMG_4626.JPG 
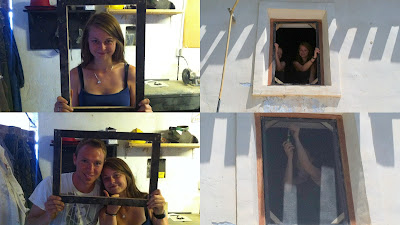
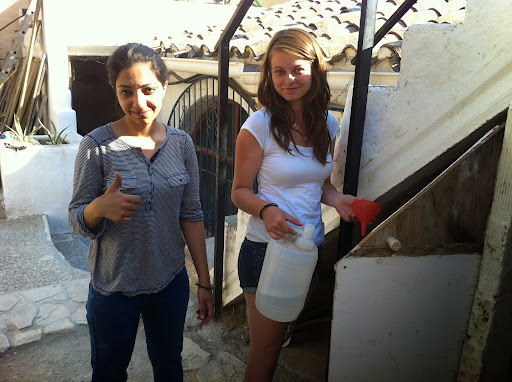
New wood frames with mosquitoes net for the Isabella’s dormitory were done, trying to make a little bit more difficult to them entry the room. 
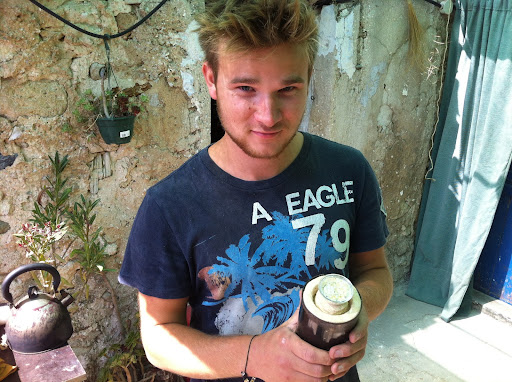
Michael y Rabbiya made an experiment based on Nicolai Tesla’s research where its intended to capture some electricity from the magnetic fields that are covering us. The result was not enough to build a power plant, but the measures indicated than something is around there… 
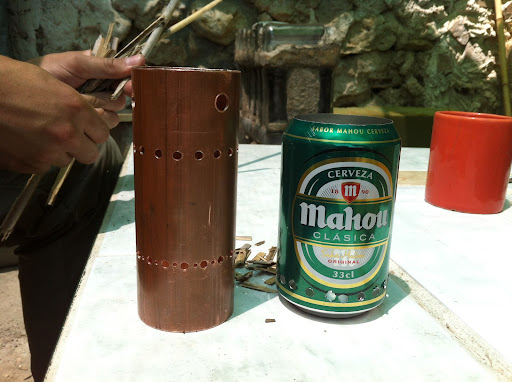
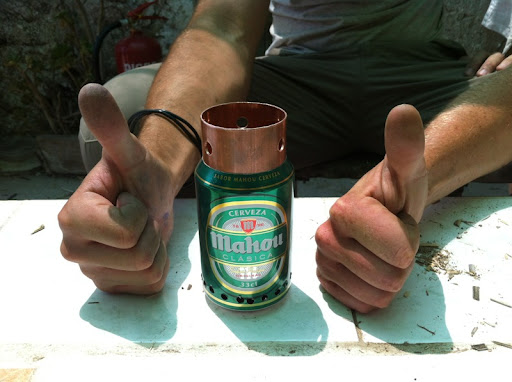
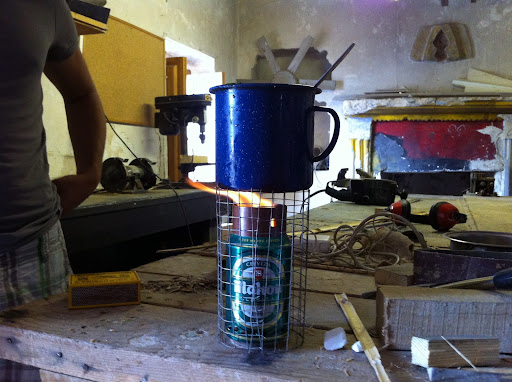
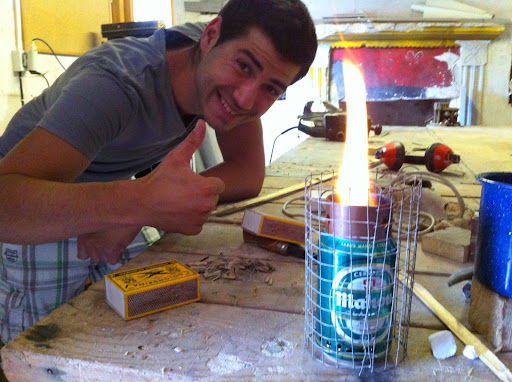
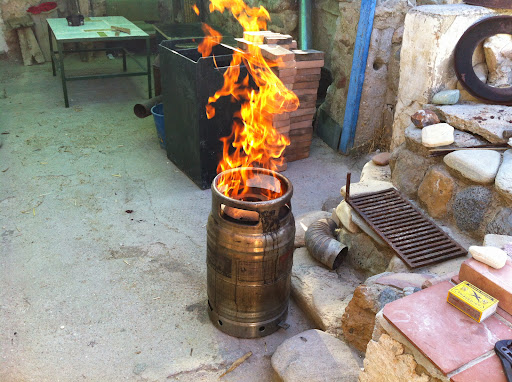
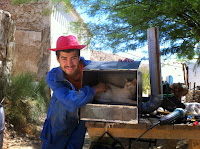
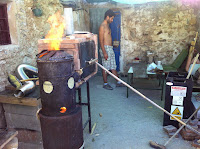
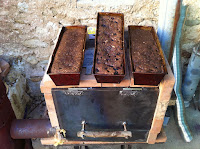
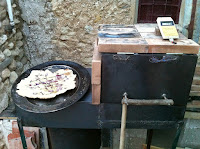
Supporting the sustainable living department, Heloise made mulberries marmalade using Kaña!!! 2, our biomass gasifier that employes dry cane of the valley as renovable fuel. IMG_5044.JPG 
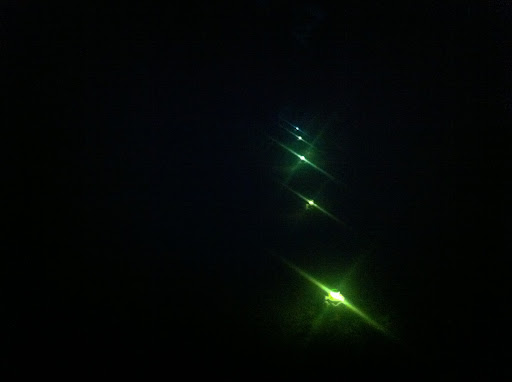
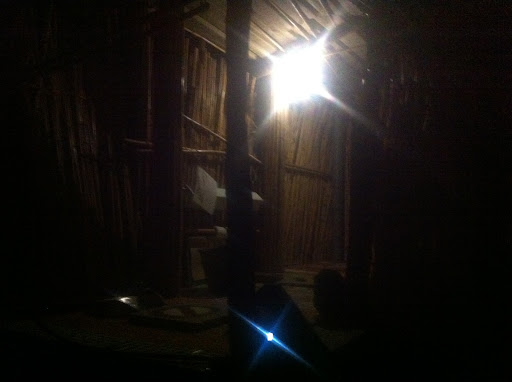
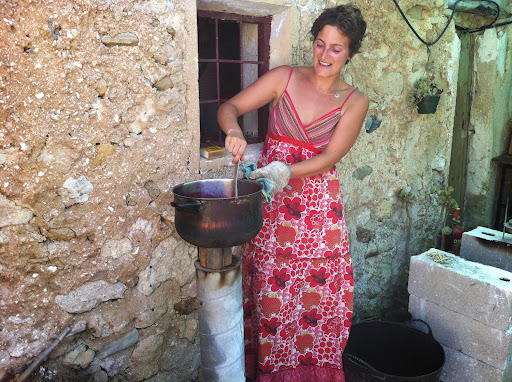
In Sunseed, we use compost toilets, where all our faeces are mixed with other organic matter and composted, producing what is called “humanure”. This toilets are at a ditance from the houses, in the gardens area. Nightly visits should be made with a lamp and a lot of attention, since the old light system is totally desintegrated. Clemens, Rabbiya, Inga and Cristabel designed a new system, composed by a PV panel, charger, battery and several light points i strategical points: toilet, ladder, sink and access path. The 5 light points of the path were designed by Clemens. On a mosaic tile, a stone pile was made with cement with a hole in the middle. Inside where installed bottom parts of beer bottles with a LED bulb and a reflector made with metallic part of tetrapack packages. All reused materials. IMG_4938.JPG 
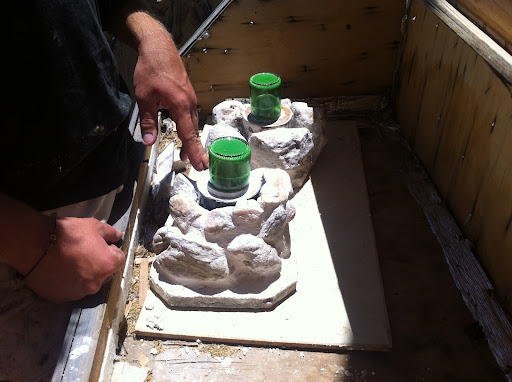
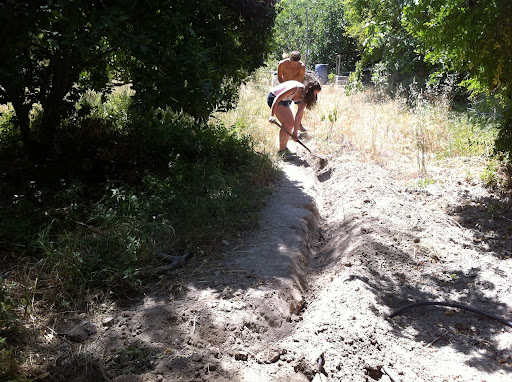
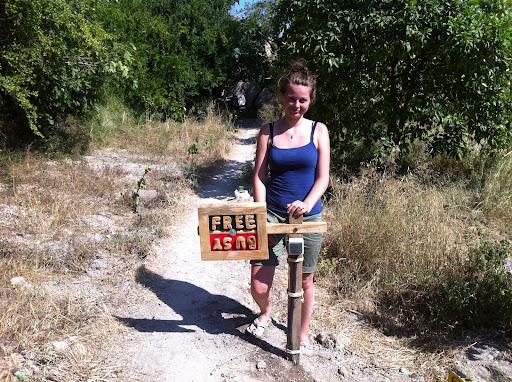
The free/busy indicator was redesigned too. Wood letters where carved and the on-off switch of the system was installed on a new pole. To wire the path, we opened a trench to bury the plastic pipe with the cables for the bulbs and switch, staying all rain proof and hidden in the edge of the gardens. IMG_4542.JPG All Sunseed members were invited to the inauguration. We offered mojitos in the toilet and the AT team did a small performance. When the darkness came, after dinner, an inauguration ribbon was set up. Jyoti was in charge to switch on the lights, and following, all the AT department went through the path with solemnity under the Star Wars Imperial March musical notes. The ribbon was cut and we proceed to drink that delicious mojitos with ice and fresh mint.

por Pako Ibáñez, coordinador del departamento de Tecnología Apropiada de Sunseed.

La actividad durante Julio ha sido excepcional en Sunseed. En el departamento de TA no hemos parado ni un día con diferentes proyectos y actividades realizadas por l@s fantástic@s voluntari@s que han escogido estas fechas para estar compartir experiencias. IMG_5112.JPG

Inga y Rabbiya tuvieron su primer contacto con la producción de energía eléctrica fotovoltaica realizando el mantenimiento de los 3 sistemas que tenemos instalados en las diferentes casas de Sunseed. Se limpiaron los paneles de polvo acumulado, revisaron los voltajes de salida, la estanqueidad de las cajas de conexión, se repuso agua destilada en la batería de la casa principal y se revisaron los conexionados. IMG_4626.JPG

Para las ventanas del dormitorio en la casa de Isabella, se realizaron nuevos marcos de madera con tela mosquitera para que los mosquitos lo tengan un poquito más difícil a la hora de entrar en la habitación.

Michael y Rabbiya realizaron un experimento basado en las investigaciones de Nicola Tesla donde se pretende captar electricidad de los campos electromagnéticos que nos envuelven. El resultado no fue como para montar una central de producción de electricidad, pero las medidas indicaron que haberla, hayla…

Dando soporte al departamento de vida sostenible, Heloise hizo mermelada de moras utilizando Kaña!!! 2, nuestro gasificador de biomasa que usa caña seca del valle como combustible renovable. IMG_5044.JPG   En Sunseed utilizamos las llamadas letrinas de compost, en las cuales todas nuestras heces se mezclan con otras materias orgánicas y se compostan, produciendo lo que se viene a llamar en inglés “humanure” o abono humano. Estas letrinas se encuentran separadas de las casas, concretamente en la zona de huertos. La visita nocturna tenía que ser hecha con linterna y mucho cuidado, pues el antiguo sistema de iluminación está totalmente desintegrado. Clemens, Rabbiya, Inga y Cristabel diseñaron un sistema nuevo basado en una placa solar, cargador, batería y una serie de puntos de luz en los lugares estratégicos: toilet (léase agujero), escaleras, pila de lavar las manos y camino de acceso.

Los 5 puntos de luz del camino fueron diseñados por Clemens. Sobre una pieza de mosaico para el suelo, se montó una pila de piedras con cemento, dejando un hueco en ella. En él se colocaron culos de botella de cerveza con una bombilla LED dentro y un reflector hecho con la parte metalizada de cartones tetrapack. Todo material reutilizado. IMG_4938.JPG

El indicador de libre/ocupado también fue rediseñado, con letras en relieve recortadas en madera y el interruptor del sistema colocado en el mismo palo de soporte. Para el cableado del camino, abrimos una zanja para enterrar el tubo de plástico con los cables para las bombillas y el interruptor, quedando todo protegido de la lluvia y disimulado en el margen de las camas de los huertos. IMG_4542.JPG

El punto friky lo puso la inauguración, a la que se invitó a todo Sunseed a tomar unos mojitos en la misma letrina y en la que todo el equipo del departamento realizamos una breve representación. Cuando llegó la oscuridad, después de cenar, se preparó una cinta inaugural. Jyoti fue la encargada de dar la luz y, a continuación, todo el departamento de TA cruzó el camino con solemnidad bajo la marcha imperial de La Guerra de las Galaxias. Se cortó una cinta inaugural y procedimos a beber esos mojitos deliciosos que se habían preparado con hielo y menta fresca.

0